The super easy minimalist way to bake on a stovetop
The number one question I get from our camping neighbors is, “Do you have an oven in your van?” Of course we don’t, so the number two question is always, “Then how did you manage to bake a cake/bread/cookies?!”
I get it. The world is full of injustices, and I was shocked to learn that the Internet has almost no info on stovetop baking and roasting. It’s really uncommon. You might see the odd recipe for bananas foster but even so-called “skillet” recipes culminate anticlimactically in placing your skillet in your oven at 350 degrees for 45 minutes. Thanks, but not helpful if you don’t have an oven. Incidentally, we discovered Omnia’s incredible stovetop oven contraption that produces all the baked goods your heart desires—BUT (and this is a huge butt)—things come out shaped like toilet seats. To be fair, I’d definitely still eat that.

Meet Instant Pot 2.0, the Instant Potty
That’s why, but after countless experimentations and tweaks, I’m stoked to share a more-or-less foolproof setup for stovetop baking. The best part is you only need the 3 items that you would use to cook pretty much anything else. No water baths, no single purpose equipment, no messy coals or firepits.
The super easy minimalist way to bake on a stovetop
Below is my 3-item setup for baking everything from quickbreads to three-layer cakes without an oven. You’ll need:
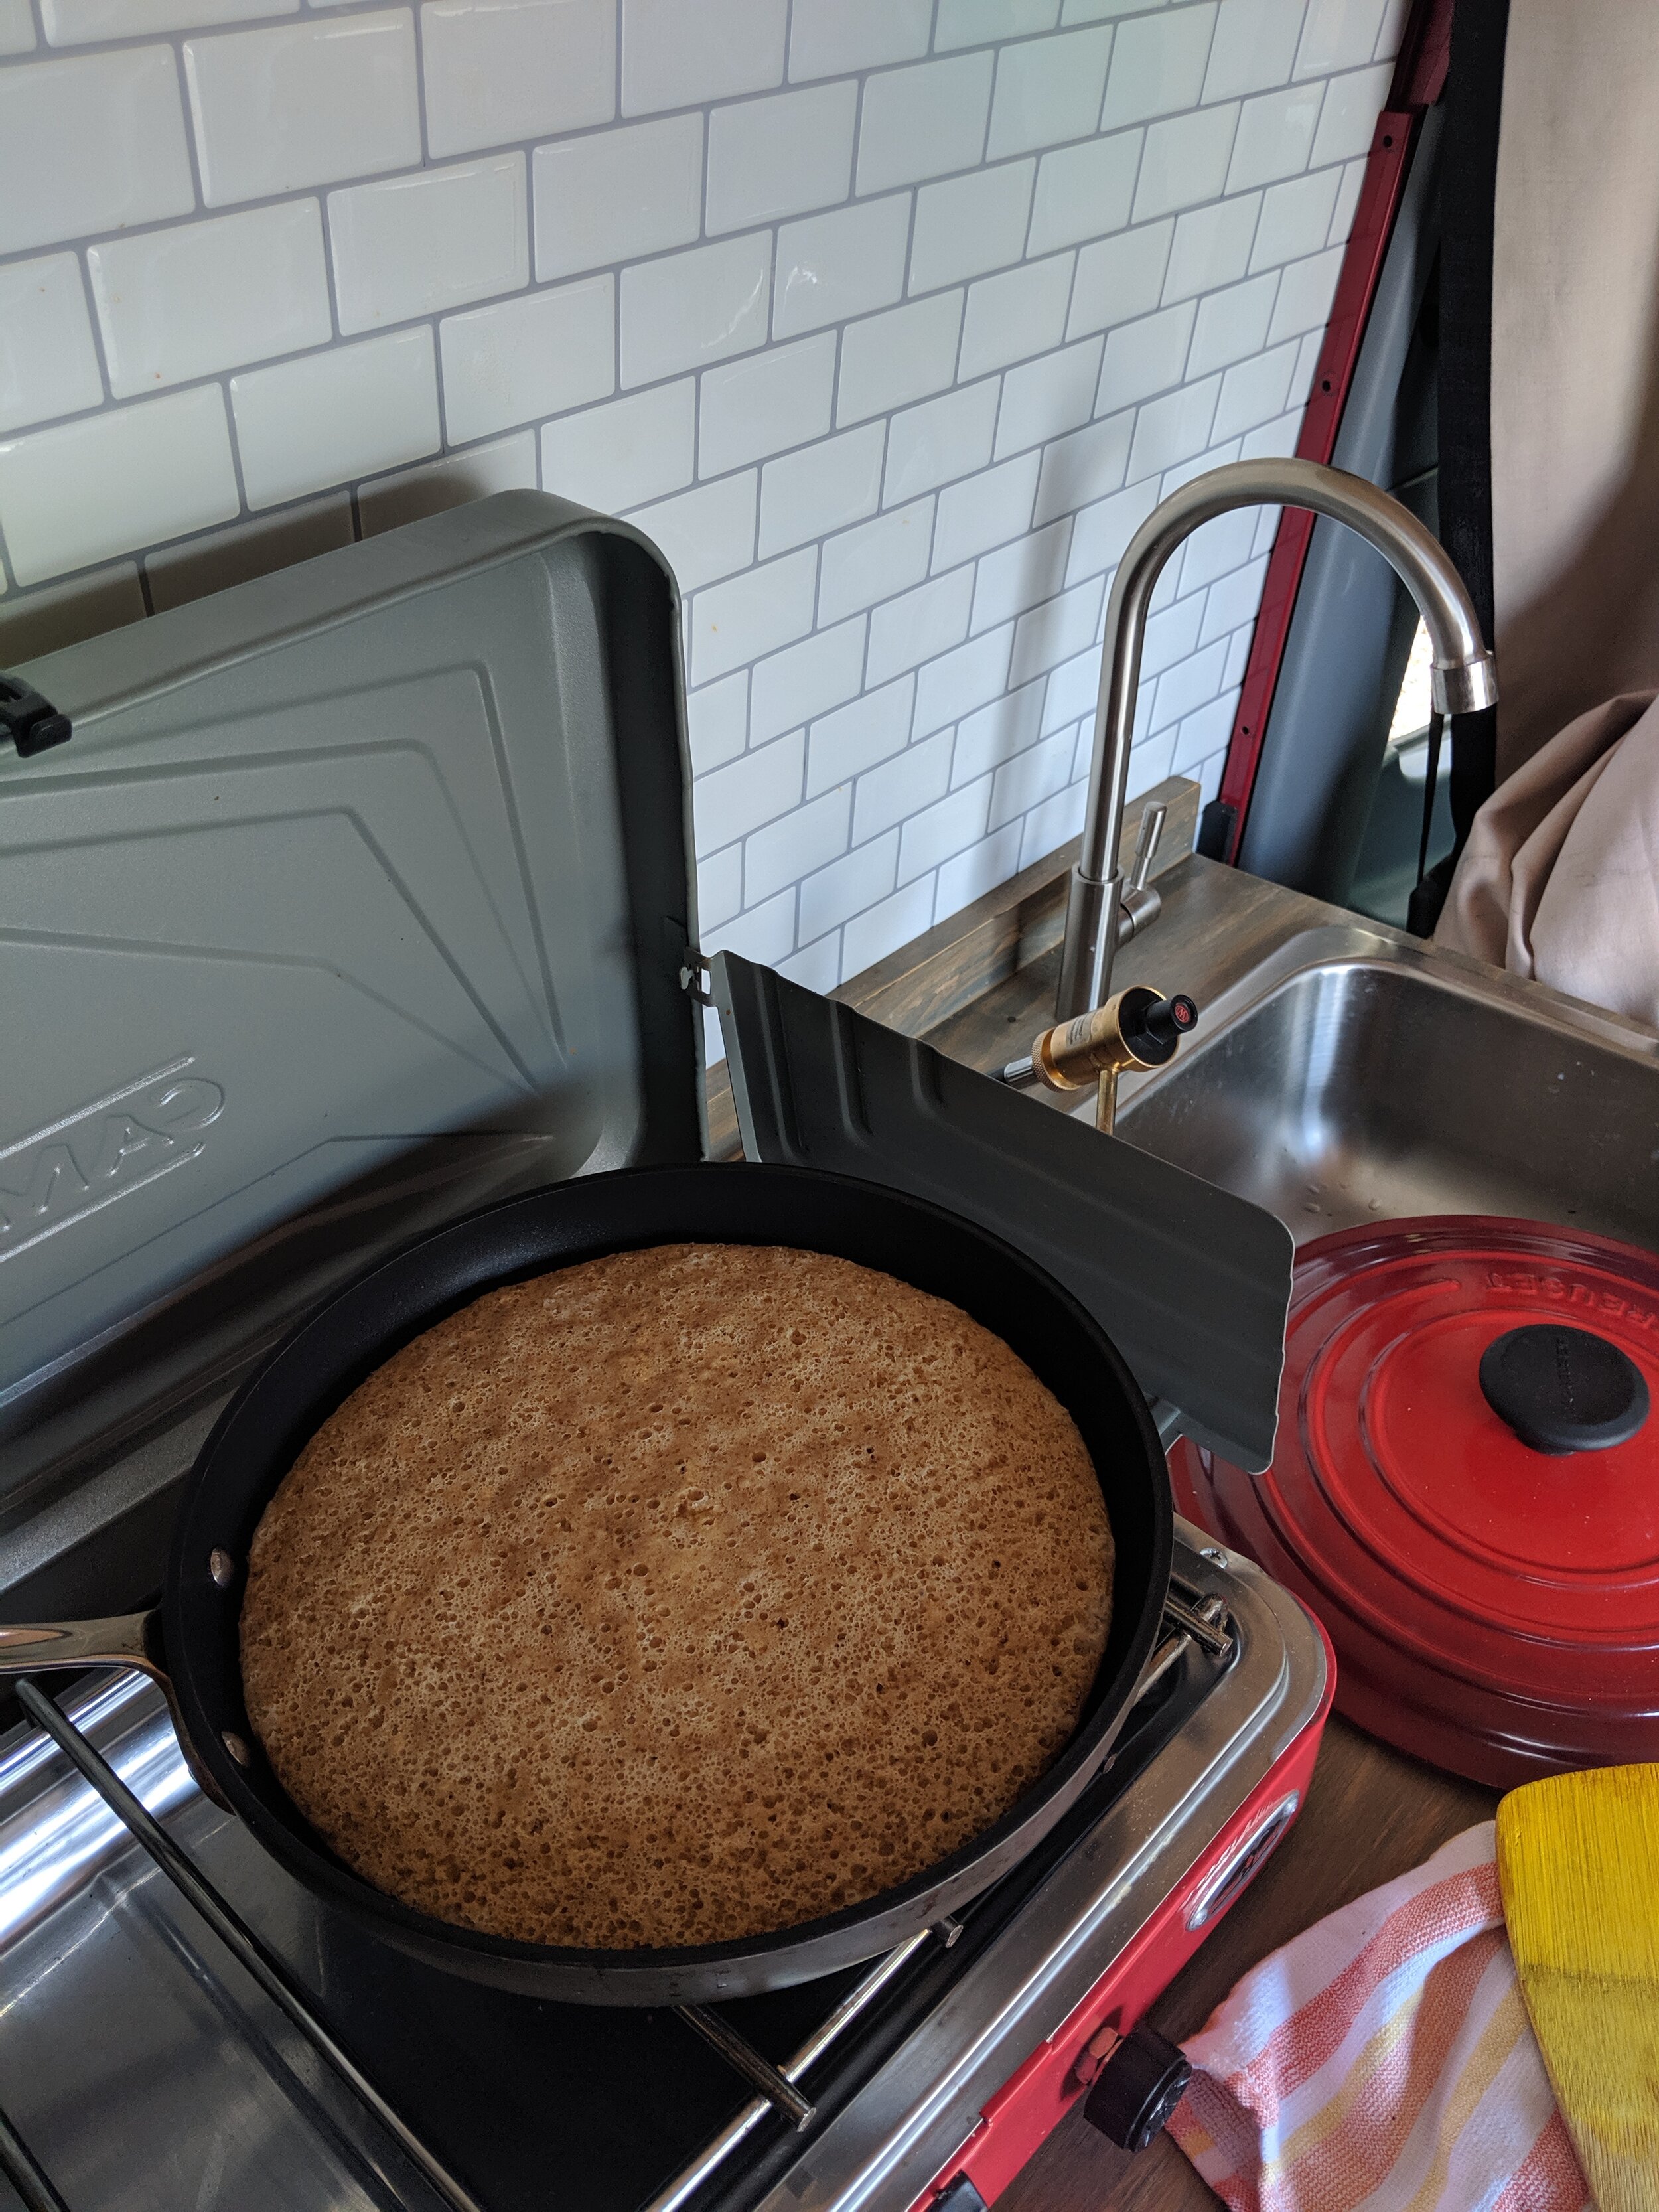
The basic setup.
A quality non-stick skillet. I’m obsessed with my All Clad non-stick 10” fry pan. It’s so incredibly versatile (as with most items we own) that I cook 90% of our meals and 100% of our desserts in it. Some camp chefs swear by their cast iron skillet, but here’s why I prefer the heavy non-stick for everything:
Clean-up is a cinch. When you don’t have gallons of water and time to waste on scrubbing dishes (and emptying smelly gray water), you can clean a non-stick by swiping it with a napkin and finish with the quickest of rinses.
You only need one non-stick. I find my cast iron always tastes like the last thing I cooked in it, so if you want to make dessert you might have to own not one, but two big, heavy skillets (what a dealbreaker).
It’s lighter. Not by a ton, but cast iron skillets are so heavy they’re a pain to carry around and wash.
It’s safe. I would not use a budget non-stick as my kitchen staple because of the concerns around Teflon leaching PFOA. Thankfully All Clad is PFOA-free.
It just cooks well. It distributes heat evenly, gets red hot for searing, and retains heat wonderfully for simmering and baking.
That said, I’ll all for using what you’ve got, so don’t fret if you decide to go with the cast iron. You can still make it work.
A heavy fitted lid. This is key for baking on a stove. You need a well-fitting lid for your pan that also traps heat. You can buy All Clad pans with lids, but actually I repurpose my Le Creuset 6.75-qt dutch oven lid and it fits beautifully. You don’t need a fancy name-brand lid though, any cheap cast iron lid will do. Two pans, one lid. Win.
A propane stove. When we first started our journey I thought camp cooking would be all about piling coals on my dutch oven over a glowing fire pit, because that’s how Instagram makes it look. Let me tell you exactly the number of times we’ve cooked over a fire: zero. It’s all about that propane stove. Maybe not as romantic, but I swear, when it’s dark, windy, and raining outside and all you’re craving is some apple glazed pork chops followed by a bowl of hot berry crisp, the last thing you’re going to want to do is gather wet twigs to start a fire to prep a meal that will be ready two hours later.
I love Camp Chef’s Everest Two-Burner Camping Stove because of its powerful 20,000 BTU burners, but you can just as well use a budget option such as Coleman’s two-burner stove.
With this setup, most recipes are a variation on the same technique:
Preheat the lid (cast iron only, do not try this with a glass lid) by placing it directly over a medium-low flame for 30 seconds.
Pour the batter evenly into the cold non-stick skillet (which I don’t grease) and place the lid on. If using a cast-iron skillet, preheat it for 20 minutes on a low flame and line it with lightly greased parchment paper before pouring batter in.
Turn on a low flame. Stovetop baking is an art because there are no standard heat settings. On the Everest Two-Burner Camping Stove I find that a hair above the lowest possible flame you can get without any flickering, is the right level. The flame should be just starting to turn bright blue as opposed to dark blue flames. (Note: Different stoves have different BTU ratings so flame colors will vary if the BTU rating is higher or smaller. For example, a larger stove might produce a higher heat for a similar color flame.)
Resist the urge to lift the lid until the cake is done. Lifting the lid prematurely, more so than opening an oven, will significantly increase the cook time. This is the trickiest part because you can’t visually inspect the cake, so in all my recipes I provide a precise cook time for my recommended setup. If your setup is different you can pay attention to certain signs that the cake is done. One, the skillet starts to smell delicious. Two, you might hear muffled hissing from steam condensing in the skillet. As a rule of thumb, 5 minutes after you first smell the goods or 2 minutes after you first hear the steam means it’s a good time to check on the cake.
Test for doneness. A toothpick or a knife inserted in the center comes out clean.
Turn off the heat and (if you’re making a bread or cake) turn it out immediately. Unlike oven-baked goods which should cool 10 minutes in the pan, your hot and heavy skillet will continue to cook even after you turn off the stove. I use a rubber spatula to gently release the sides and bottom, cap the skillet with a plate and quickly invert onto the plate. You can then flip the cake right side up onto another plate. If it’s a cookie or crisp, you can enjoy it immediately out of the skillet.
Other tips
The difficulty of the recipe depends on the fat content and the consistency of the batter. My recipes tend to stick to a normal to high fat content (no low-fat substitutions) because they develop a delicious golden crust as opposed to burning. It’s still possible to make an oatmeal raisin cookie (e.g. dry oatmeal mixed in, liquid-absorbing raisins, high sugar to fat ratio) but know that your margin of error for cook times is much slimmer. Also, if you have a thin runny batter, be prepared to wait 45 min-1 hour before it’s done.
If after an hour your chocolate cake just won’t cook through the center, worst case scenario you’ve got a delicious lava cake on your hands. Some people even prefer gooey chocolate chip cookies. No matter how badly you mess up the cook time, chances are you’ll still be a hero to everybody at your campground.

Campfire cooking is fake news. We made all this on the propane stove.